 This post is for setting up Windows Live Writer with TypePad and Windows Live Writer 2011 [or previous].
This process should take all of 5 minutes.
This post also assumes you already have Windows Live Writer installed on you machine and are currently using to publish with other blogs.
You should always use the current version of Windows Live Writer [where possible]. I know there’s other that prefer the old version, but Microsoft is only going to move forward, so…
You can get the latest version of Windows Live Writer 2011 here…
If not already, download the latest version...
http://explore.live.com/windows-live-writer?os=other
See also [XP not supported]:
http://explore.live.com/windows-live-2011-system-requirements
Get the TypePad information…
![]() Go to the TypePad website and create an account…
Go to the TypePad website and create an account…
Once you have the account created, ensure you notate the NEW id and password with the URL they provided…
» With TypePad you can change your blog URL; if you do this, ensure you use that one and it is active.
» Also, if you create an account with TypePad and you use and external source such as Google, Facebook, OpenID or any other options like that; you’ll need to go to the account settings in TypePad and ADD a password to you account.
You need to do this because Windows Live Writer will NOT validate an outside sourced password.
Now on to Windows Live Writer…
Now go back to Windows Live Writer— which should already be installed on your local PC or laptop. Parts of this were taken from another post to complete this one.
Link:
http://lehsys.blogspot.com/2010/08/windows-live-writer-2011-how-to.html
To ADD a blog account to Windows Live Writer:
MENU
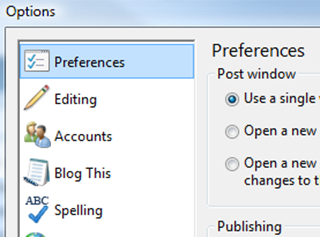
OPTIONS
ACCOUNTS » NEW
From here, you’ll actually chose ‘other services’, but it does say TypePad right there..
When your entering the address of the blog, like Blogger. It’ll be something like:
JoeSmuck.TypePad.com
And then ensure you use the correct ID and password; cut and paste the information where required, or as troubleshooting.
This will be your eMail address and the password you setup, with TypePad.
» Remember to use the NEW password if you logged in using an outside sourced password, as mentioned before.
» If you're freaked out about privacy; chose not to remember the password.
From this point, Windows Live Writer should be able to connect with the Blogger account and download your theme; ultimately being able to edit your blog with your theme simulated.
» I don’t really like TypePad; not the free version. There’s so few options with TypePad in the free version; there may be more with the PRO version, but I found with my testing that I only had 3 options for themes with TypePad. And the frst theme option I had with TypePad didn’t work completely with Windows Live Writer; which was disappointing.
I hope this helps…
Thank you,
Larry Henry Jr.
LEHSYS.com


It was so good to see you acknowledging this topic, it really feels great. Thanks for sharing such a valuable information which is very hard to find normally. I have subscribed to your website and will cheap essay writing be promoting it to my friends and other people as well.
ReplyDeleteThe post is really superb. It’s varied accessory information that consists during a basic and necessary method. Thanks for sharing this text. The substance is genuinely composed. do my dissertation for me This web log is frequently sharing useful actualities. Keep sharing a lot of posts.
ReplyDelete